Introduction
Scaling security testing is hard if you are performing manual audits and can create bottlenecks in the development lifecycle. At Faraday, we are always thinking about how to re-use and automate classic workflows; for example, in application security, tools like Burp Suite Pro provide an excellent scanner for a security baseline.
Continuous scanning allows teams to focus on managing new results and save time triaging those. Additionally, the idea of uncovering vulnerabilities during the development lifecycle enables software engineers to detect common flaws and prevents low-hanging fruits from driving to production environments.
In this article, we will do a walk-through into automating Burp Suite with Faraday Agents, allowing you to schedule scans and provide curated scan settings to other team members. By doing this, you can later create GitLab issues and reports or build metrics around the security posture of your applications.
Agents
Orchestrating is an excellent way for teams to share tooling and concentrate information in one place. Faraday provides an easier way to integrate and orchestrate some popular security tools.
Agent Architecture
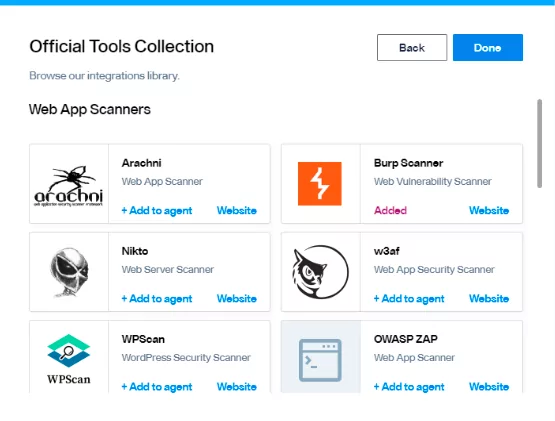
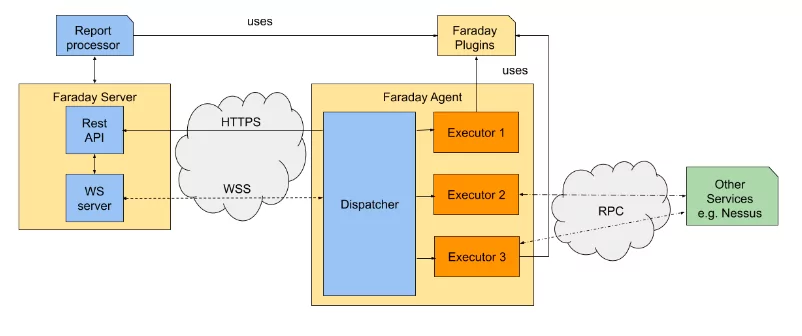 An agent can manage several tools, for each tool integration we use an “Executor”. Faraday provides a number of official Executors to make your life easier.
And all these features are Open Source, If you want you can create your own executors!
Requirements
For this lab, we will need:
– A Burp Suite Professional license.
Since we are going to configure an agent for Faraday, it must be done on the same VM that we have Burp Suite installed on.
Setting up Burp Suite
Burp Suite provides a handy API to help automate the scanner.
First of all, we must create our Rest API token. This configuration can be found at:
– User Options > Misc > Rest API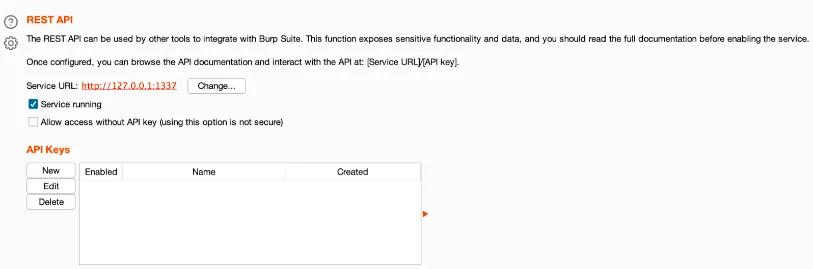
Generating an API Key
In order to create it, we just need to hit the New button and a new pop-up will be shown:
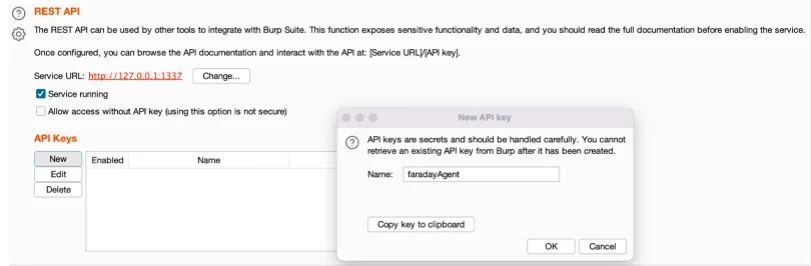 Be careful to copy the key to the clipboard, since it will be accessible only for this time. In our case, the supplied key was:
– G7PQOdeSDXn526Eqc8esV9tDCKZvenkv
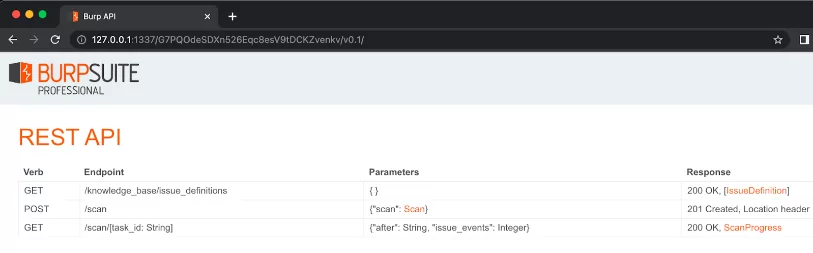
Now that it’s all set we will can access the API through our browser at:
– http://127.0.0.1:1337/<API-KEY>
Setting up Faraday Agents
We take care of the complicated part. The process is integrating a tool straightforward:
1. Create our agent from Faraday UI, we need to set a name for this Agent.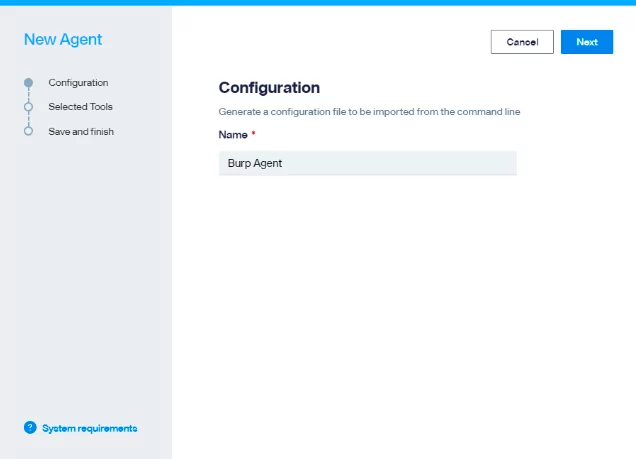
2. Select the desired tool, in this case we will be setting up Burp Suite.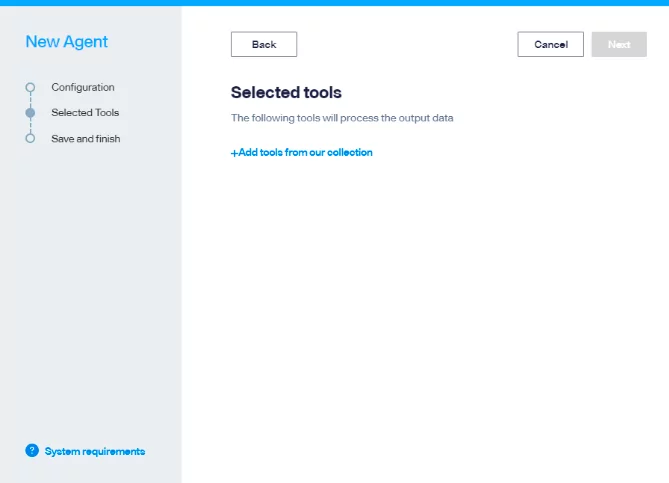
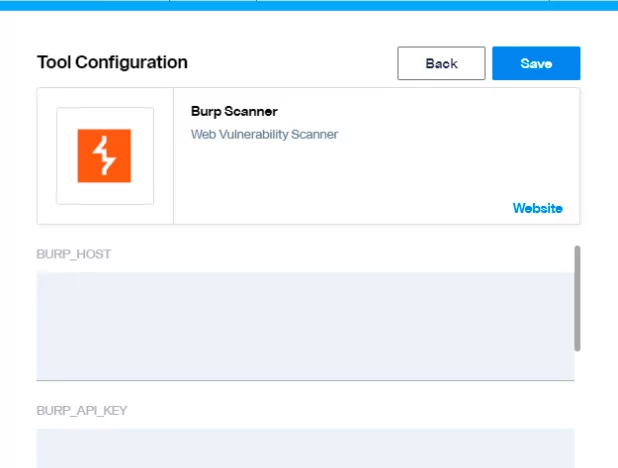
3. Each tool integration requires specific configuration, this might change depending on your environmental settings. For Burp default requirements are:
– BURP_HOST
-
- This is the IP where Burp is currently exposing it’s API
- BURP_API_KEY
- This is the key we generated in this step “Generating an API Key
- BURP_API_PULL_INTERVAL
- ‘100’
4. This process creates a configuration file, with all the necessary information to connect burp suite, download the “dispatcher.yml”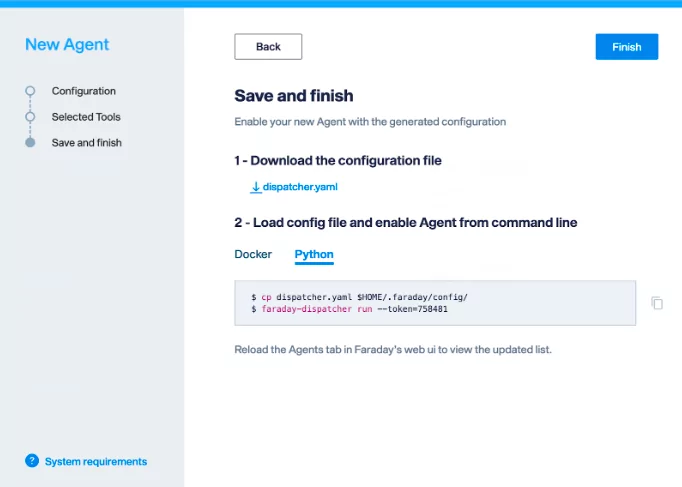
Connecting the agent
Agents provide two options to integrate tools, a self contained docker with a number of Open Source Tools and a Python helper.
Since Burp Suite Pro cannot be embedded in our Docker we will be using the Python alternative
At first, we will need to install faraday-dispatcher:
➜ pip3 install faraday_agent_dispatcher
➜  .faraday faraday-dispatcher run --token=758481

2022-07-25 15:45:14,812 - faraday_agent_dispatcher - INFO {MainThread} [dispatcher.py:153 - register()]  token_registration_url: https://myserver.com:443/_api/v3/agent_registration

2022-07-25 15:45:15,194 - faraday_agent_dispatcher - INFO {MainThread} [dispatcher.py:192 - register()]  Registered successfully

2022-07-25 15:45:15,917 - faraday_agent_dispatcher - INFO {MainThread} [dispatcher.py:235 - connect()]  Connection to Faraday server succeeded
If everything goes well, we must see the online button in our UI.
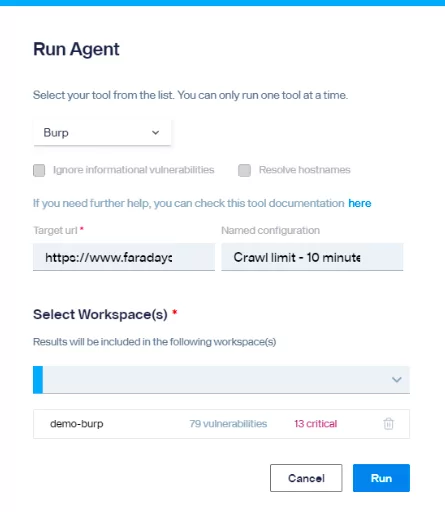
Running a scan from de UI
It’s all set, we just need to launch the scan, 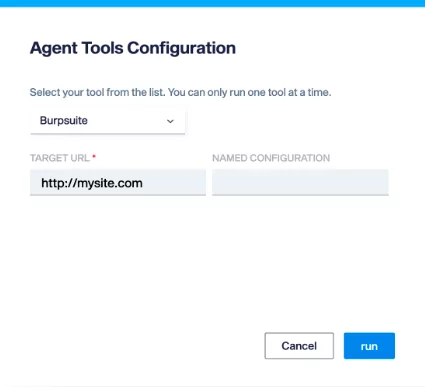
The default “Named Configuration” in Faraday agents will run a “crawl & audit” scan. Burp Suite provides a number of built-in Scan profiles.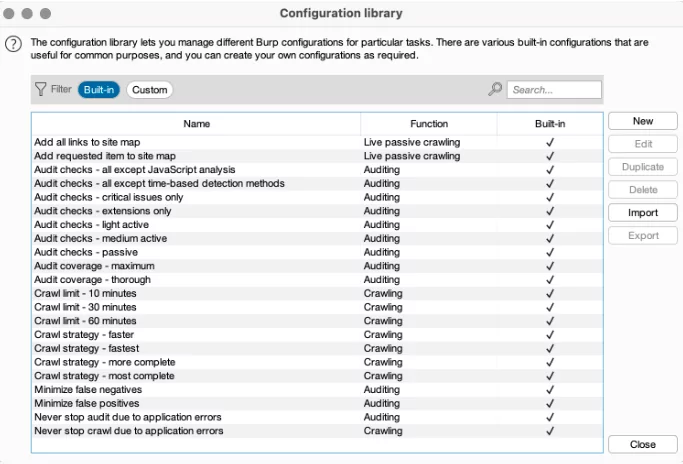 Customization of the different scan profiles and what works on you end can be reviewed over here:
Burp Scanner built-in configurations
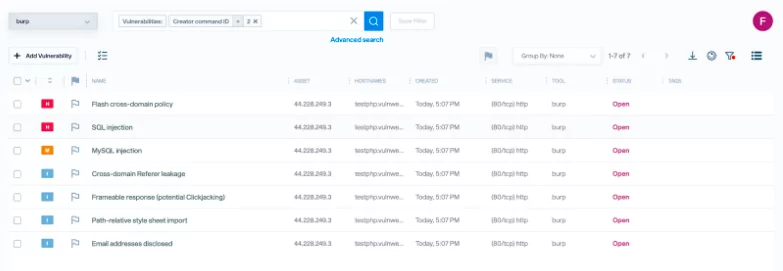
Our logs verifies that a new scan was created:
➜  .faraday faraday-dispatcher run

2022-07-25 15:50:53,807 - faraday_agent_dispatcher - INFO {MainThread} [dispatcher.py:256 - run_once()]  Parsing data: {"execution_id": 5, "agent_id": 4, "workspace": "burpsuite", "action": "RUN", "executor": "burpsuite", "args": {"TARGET_URL": "http://testphp.vulnweb.com/"}}

2022-07-25 15:50:53,812 - faraday_agent_dispatcher - INFO {MainThread} [metadata_utils.py:59 - check_commands()]  Dependency check ended. Ready to go

2022-07-25 15:50:53,813 - faraday_agent_dispatcher - INFO {MainThread} [dispatcher.py:415 - run_once()]  Running burpsuite executor
And also Burpsuite 🙂
Running Scans from the CLI
Once everything is set you can also run any agent directly from your CLI, this is quite useful since it allows you the possibility to automate your testing using custom scripts and leveraging faraday features.
Also if you are looking to integrate Burp in your CI/CD Pipeline this is a great way to do this and collect any artifact produced during testing.
If it’s your first time using faraday-cli, you must need to authenticate to the server that has the agent running:
➜  ~ faraday-cli auth

Faraday url [https://faraday.mysite.xyz]:

Validate SSL certificate for [faraday.mysite.xyz] (Y, N) [Y]:

User: myuser

Password: ***************

2FA: ****

Saving config

✔ Authenticated with faraday: https://faraday.mysite.xyz
And then, list the available agents:
Faraday> agent list
ID NAME ACTIVE STATUS EXECUTORS
—- ———– ——– ——– —————
1 demo_agent True online nmap, discovery
4 DAST – BURP True online burp
Faraday>
➜  ~ faraday-cli agent run -a 4 -e burpsuite -w burpsuite

TARGET_URL (string): http://testphp.vulnweb.com/artists.php?artist=2

NAMED_CONFIGURATION (string): Crawl strategy - fastest

Running executor: burpsuite/burpsuite

Parameters: {"TARGET_URL": "http://testphp.vulnweb.com/artists.php?artist=2", "NAMED_CONFIGURATION": "Crawl strategy - fastest"}

Generated Command: 680
Just as a side note, the parameters above are:
– -a, for our agent ID.
– -e, the executor name
– -w, the workspace
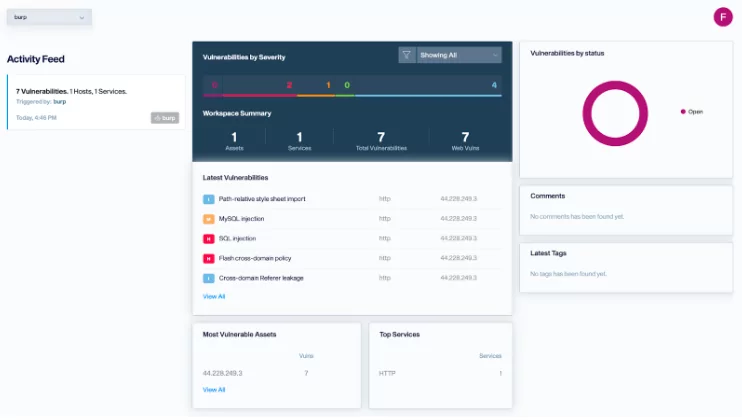
Getting the results
 Our logs verifies that a new scan was created:
➜  .faraday faraday-dispatcher run

2022-07-25 15:50:53,807 - faraday_agent_dispatcher - INFO {MainThread} [dispatcher.py:256 - run_once()]  Parsing data: {"execution_id": 5, "agent_id": 4, "workspace": "burpsuite", "action": "RUN", "executor": "burpsuite", "args": {"TARGET_URL": "http://testphp.vulnweb.com/"}}

2022-07-25 15:50:53,812 - faraday_agent_dispatcher - INFO {MainThread} [metadata_utils.py:59 - check_commands()]  Dependency check ended. Ready to go

2022-07-25 15:50:53,813 - faraday_agent_dispatcher - INFO {MainThread} [dispatcher.py:415 - run_once()]  Running burpsuite executor
And also Burpsuite 🙂
 Ready to go?
If you have any questions please book a call with one of our expertsReferences: