Faraday in the software development process – Jenkins – Part 2

Last time we explained how easily you can integrate your Faraday instance into the software development process of an application written in Python and deployed on Heroku. In that post, we used GitHub Actions as a CD/CI tool. (link all integrations)
Now we are going to perform the same task but instead of using GitHub Actions, we are going to use Jenkins with pipelines since this is one of the most extended CD/CI tools in the community.
Previous considerations
As we’ve covered all the theory and requirements in the previous post, we are going to assume that you already have an application written in Python, uploaded to a Git repository, and it is easily deployable to Heroku. If this is not the case, please visit the mentioned post to have more context.
In addition, it’s required for you to have a running instance of Jenkins with Blue Ocean plugin installed which supports docker images. If this is not the case, we recommend making sure that all this configuration is done before starting to read this post, since trying to follow this post at the same time you’re setting up Jenkins could be a little bit messy.
Lastly, we are not going to explain how to configure Blue Ocean and how to create Jenkins jobs because we understand that you already count with a minimum knowledge of Jenkins.
Step 1: Creating the Jenkinsfile
Our first step is to create a file in the root of our repository called Jenkinsfile. This file will be read by our Jenkins instance and this file indicates how the pipeline workflow will be.

Once this file is created, we need to write the following:
pipeline {
      agent none
      stages {
        stage(‘Build’) {

        }
        stage(‘Deploy’) {        }
        stage(‘Scan’) {        }
        stage(‘Upload’) {

        }
    }
}
Let’s explain what each line means:
1-Jenkins pipelines let us use Groovy language to run tasks. In addition, the first line of every Jenkinsfile must start with pipeline {} closure.
2-Inside of the pipeline closure we can declare a lot of things, but agents and stages are mandatory. Agents indicate where they are going to be executed at different stages and could have different configurations (for example, they can run on Linux, on Windows, etc.) Stages are groups of steps that could have their own configuration set. In our example, we’ve defined agent none because we’re going to use different agents in each stage. Because of agent none, we need to declare the agent in each stage as mandatory.
3-By default, all the stages will run sequentially, unless you specify that they should run in parallel. In our example, we are running only this pipeline in a sequential order. In addition, each stage will have a label to easily recognize when it’s running on Jenkins.
Step 2: Declaring the Build stage
Our first declaration will be the Build stage. This stage will install the required dependencies and will run Bandit to perform the static code check:
pipeline {
    agent none
    stages {
        stage(‘Build’) {
            agent {
                docker {
                    image ‘python:3.9.1’
                    args ‘-u root:root’
                }
            }
            steps {
            sh ‘pip install -r requirements.txt’
            sh ‘bandit -r . -f xml -o flaskapp_faraday_bandit.xml || true’
            stash name: ‘flaskapp_faraday_bandit.xml’, includes: ‘flaskapp_faraday_bandit.xml’
            }

        }
        stage(‘Deploy’) {        }
        stage(‘Scan’) {        }
        stage(‘Upload’) {

        }        }
    }
}
As you can see, we’ve defined the agent inside the Build stage. As we’ve explained before, this is required here because we declared agent none globally. Our agent will be a docker container with the python:3.9.1 image and with root permissions.
Then, we defined the steps. Each step will be executed sequentially.
The first step installs the dependencies using the requirements.txt file (Bandit dependency is located there). The second step runs Bandit and saves the output in the flaskapp_faraday_bandit.xml file.
Some important notes about this:
1-In our example, we are ignoring the Bandit execution result just to avoid making this file more complex.
2-A real application requires more steps, but this example is simplified to only install dependencies.
Lastly, since each stage could use different agents, we need to share the result file among them just as we did when we used GitHub Actions. To do that, we used the function stash which we’ll combine with unstash later.
Step 3: Declaring Deploy stage
The Deploy stage will upload the application to Heroku as shown here:
pipeline {
    agent none
    stages {
        stage(‘Build’) {
            agent {
                docker {
                    image ‘python:3.9.1’
                    args ‘-u root:root’
                }
            }
            steps {
                sh ‘pip install -r requirements.txt’
                sh ‘bandit -r . -f xml -o flaskapp_faraday_bandit.xml || true’
                stash name: ‘flaskapp_faraday_bandit.xml’, includes: ‘flaskapp_faraday_bandit.xml’
            }
         }
         stage(‘Deploy’) {
             agent any
             steps {
             withCredentials([
                 string(credentialsId: ‘HEROKU_API_KEY’, variable: ‘HEROKU_API_KEY’),
                 string(credentialsId: ‘HEROKU_APP_NAME’, variable: ‘HEROKU_APP_NAME’),
             ]) {
                script {
                    try {
                        sh ‘git remote add heroku https://heroku:$HEROKU_API_KEY@git.heroku.com/$HEROKU_APP_NAME.git’
                        }
                        catch(Exception e) {
                            echo ‘Remote heroku already exists’
                        }
                    }
                    sh ‘git push heroku HEAD:master -f’
                }
           }
        }
        stage(‘Scan’) {        }
        stage(‘Upload’) {

        }
    }
}
There are some interesting points to mention here:
1-We’ve used the credentials plugin when we called the withCredentials function. This plugin allows us to store secrets in Jenkins and retrieve them in our pipelines just as we did with GitHub Actions. We’ll explain how to store secrets in Jenkins later in this post.
2-As you can see, in the first step we are adding the remote Heroku in Git and that is where we’re using the secrets.
3-Lastly, we deploy the application to Heroku calling git push.
Step 4: Declaring the Scan stage
The Scan stage will execute zap over our recently deployed application. This will be very similar to what we did with GitHub Actions.
pipeline {
    agent none
    stages {
        stage(‘Build’) {
            agent {
                docker {
                    image ‘python:3.9.1’
                    args ‘-u root:root’
                }
            }
            steps {
                sh ‘pip install -r requirements.txt’
                sh ‘bandit -r . -f xml -o flaskapp_faraday_bandit.xml || true’
                stash name: ‘flaskapp_faraday_bandit.xml’, includes: ‘flaskapp_faraday_bandit.xml’
            }
            }
            stage(‘Deploy’) {
                agent any
                steps {
                    withCredentials([
                        string(credentialsId: ‘HEROKU_API_KEY’, variable: ‘HEROKU_API_KEY’),
                        string(credentialsId: ‘HEROKU_APP_NAME’, variable: ‘HEROKU_APP_NAME’),
                    ]) {
                        script {
                            try {
                                sh ‘git remote add heroku https://heroku:$HEROKU_API_KEY@git.heroku.com/$HEROKU_APP_NAME.git’
                        }
                        catch(Exception e) {
                            echo ‘Remote heroku already exists’
                        }
                    }
                    sh ‘git push heroku HEAD:master -f’
                }
             }
        }
        stage(‘Scan’) {
            agent any
            steps {
                withCredentials([
                    string(credentialsId: ‘ZAP_SCAN_URL’, variable: ‘ZAP_SCAN_URL’)
                ]) {
                    sh ‘docker run -v $WORKSPACE:/zap/wrk/:rw --network=host -t owasp/zap2docker-stable zap-baseline.py
-t $ZAP_SCAN_URL -x flaskapp_faraday_zap.xml || echo 0’
                    stash name: ‘flaskapp_faraday_zap.xml’, includes: ‘flaskapp_faraday_zap.xml’
                }
            }
        }
        stage(‘Upload’) {
            agent {
                docker {
                    image ‘python:3.9.1’
                    args ‘-u root:root -v $WORKSPACE:/reports’
                }
            }
            steps {
                withCredentials([
                    string(credentialsId: ‘FARADAY_URL’, variable: ‘FARADAY_URL’),
                    string(credentialsId: ‘FARADAY_USERNAME’, variable: ‘FARADAY_USERNAME’),
                    string(credentialsId: ‘FARADAY_PASSWORD’, variable: ‘FARADAY_PASSWORD’)
                ]) {
                    unstash ‘flaskapp_faraday_bandit.xml’
                    unstash ‘flaskapp_faraday_zap.xml’
                    script {
                        CURRENT_DATE = (
                            script: “echo \${date + ‘%Y-%m-%d’}”
                            returnStdout: true
                        ).trim()
                        JOB_NAME = (
                            script: “echo $JOB_NAME| cut -d’/’ -f1”
                            returnStdout: true
                        ).trim()
                     }
                     sh “pip install faraday-cli”
                     sh “faraday-cli auth -f $FARADAY_VMPIPELINES_FARADAY_URL -u $FARADAY_VMPIPELINES_FARADAY_USERNAME -p $FARADAY_VMPIPELINES_FARADAY_PASSWORD”
                     sh “faraday-cli create_ws $JOB_NAME-$CURRENT_DATE-$BUILD_NUMBER”
                     sh “faraday-cli process_report -w  $JOB_NAME-$CURRENT_DATE-$BUILD_NUMBER /reports/flaskapp_faraday_bandit.xml”
                     sh “faraday-cli process_report -w  $JOB_NAME-$CURRENT_DATE-$BUILD_NUMBER /reports/flaskapp_faraday_zap.xml”
              }
           }
        }
    }
}
Again, we’ve used stored secrets in Jenkins: FARADAY_URL, FARADAY_USERNAME and FARADAY_PASSWORD.
As you can see, the first two steps are to unstash the previous generated files, so now they are accessible in the stage workspace.
The following step is the creation of the variables CURRENT_DATE and JOB_NAME that will be used to create the Faraday workspace name later.
Lastly, we execute the same commands we did in the previous post using the faraday-cli library. We need to pay attention to the stage configuration since here we’re running all steps inside a docker image with Python 3. Also, we are linking the Jenkins workspace to this image in the directory /reports.
As mentioned before, we are going to show you an alternative to the previous configuration but now using a custom docker image created by us
pipeline {
    agent none
    stages {
        stage(‘Build’) {
            agent {
                docker {
                    image ‘python:3.9.1’
                    args ‘-u root:root’
                }
            }
            steps {
                sh ‘pip install -r requirements.txt’
                sh ‘bandit -r . -f xml -o flaskapp_faraday_bandit.xml || true’
                stash name: ‘flaskapp_faraday_bandit.xml’, includes: ‘flaskapp_faraday_bandit.xml’
            }
        }
        stage(‘Deploy’) {
            agent any
            steps {
                withCredentials([
                    string(credentialsId: ‘HEROKU_API_KEY’, variable: ‘HEROKU_API_KEY’),
                    string(credentialsId: ‘HEROKU_APP_NAME’, variable: ‘HEROKU_APP_NAME’),
                ]) {
                    script {
                        try {
                            sh ‘git remote add heroku https://heroku:$HEROKU_API_KEY@git.heroku.com/$HEROKU_APP_NAME.git’
                        }
                        catch(Exception e) {
                            echo ‘Remote heroku already exists’
                        }
                    }
                    sh ‘git push heroku HEAD:master -f’
                }
            }
        }
        stage(‘Scan’) {
            agent any
            steps {
                withCredentials([
                    string(credentialsId: ‘ZAP_SCAN_URL’, variable: ‘ZAP_SCAN_URL’)
                ]) {
                    sh ‘docker run -v $WORKSPACE:/zap/wrk/:rw --network=host -t owasp/zap2docker-stable zap-baseline.py -t $ZAP_SCAN_URL -x flaskapp_faraday_zap.xml || echo 0’
                    stash name: ‘flaskapp_faraday_zap.xml’, includes: ‘flaskapp_faraday_zap.xml’
                }
            }
        }
        stage(‘Upload’) {
            agent any
            steps {
                withCredentials([
                    string(credentialsId: ‘FARADAY_URL’, variable: ‘FARADAY_URL’),
                    string(credentialsId: ‘FARADAY_USERNAME’, variable: ‘FARADAY_USERNAME’),
                    string(credentialsId: ‘FARADAY_PASSWORD’, variable: ‘FARADAY_PASSWORD’)
                ]) {
                    unstash ‘flaskapp_faraday_bandit.xml’
                    unstash ‘flaskapp_faraday_zap.xml’
                    script {
                        CURRENT_DATE = (
                            script: “echo \${date + ‘%Y-%m-%d’}”
                            returnStdout: true
                        ).trim()
                        JOB_NAME = (
                            script: “echo $JOB_NAME| cut -d’/’ -f1”
                            returnStdout: true
                        ).trim()
                    }                    sh “docker build https://github.com/infobyte/docker-faraday-report-
uplodaer.git#master -t faraday-uploader”sh “docker run --rm -v $WORKSPACE:$WORKSPACE -e HOST=$FARADAY_URL -e USERNAME=$FARADAY_USERNAME -e PASSWORD=$FARADAY_PASSWORD -e WORKSPACE=$JOB_NAME-$CURRENT_DATE-$BUILD_NUMBER -e FILES=$WORKSPACE/flaskapp_faraday_bandit.xml faraday-uploader”
                   sh “docker run --rm -v $WORKSPACE:$WORKSPACE -e HOST=$FARADAY_URL -e USERNAME=$FARADAY_USERNAME -e PASSWORD=$FARADAY_PASSWORD -e WORKSPACE=$JOB_NAME-$CURRENT_DATE-$BUILD_NUMBER -e FILES=$WORKSPACE/flaskapp_faraday_zap.xml faraday-uploader”
                }
            }
        }
    }
}
This approach is pretty similar to the previous one but, instead of running inside a docker image, it runs on a Jenkins node.
The most important part of this approach appears in the last 3 lines of the stage:
1-First we perform an image build of our custom docker image.
2-Then we run the container twice using the built image previously (one step per report file). It’s important to mention that, in order to let the docker image access to unstashed report files, we’ve run the containers using the param -v $WORKSPACE:$WORKSPACE which allows docker containers to see the Jenkins workspace in an absolute path.
As you can see, the Jenkinsfile setup is pretty straightforward and it doesn’t have a lot of differences compared to GitHub Actions. Now we are going to explain how to run our new Jenkinsfile in Jenkins using the Blue Ocean plugin.
Step 7: Storing secrets in Jenkins
As mentioned, we used secrets for the most important variables during the Jenkinsfile creation. We did this because storing credentials or keys in a public repository is not a good practice.
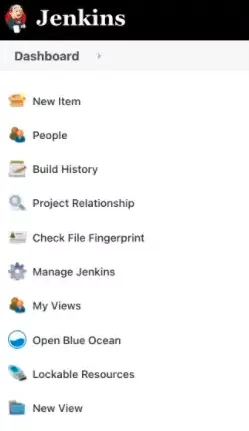
To add new secrets, we need to go to our Jenkins instance (in our case it is http://localhost:8080). Then, we need to click on Manage Jenkins in the left menu as you can see in the next image
Now we need to find the Manage Credentials option in the Security section:

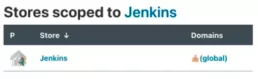
Once inside, we will click on the (globals) option:
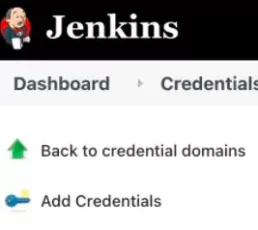
If we’ve never added a secret, there will be a message saying that our credentials vault is empty with a link for us to create a new secret. In addition, we can click on the left menu option called Add Credentials:
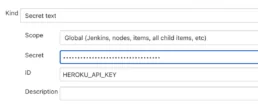
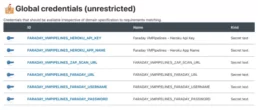
Once we are located in the new credential page, we need to change the credential type. For example purposes, we are going to use Secret Text of credential type (for Faraday username and password too). After selecting the kind of credential, we need to write the ID and the Secret. The ID should be the same that we’ve used in the Jenkinsfile and in the secret is the value:
All credentials are available in Jenkins for all the jobs, so our recommendation is to use a prefix per job to avoid future problems. Please remember you need to update the Jenkinsfile with the new credential ids. In our case, we added the prefix FARADAY_VMPIPELINES_.
Once we’ve added all the secrets, we need to set up our pipeline entering to /blue url under our Jenkins instance (in our case it is http://localhost:8080/blue).
If this is your first time using this plugin, there will be only one option and it will be Add New Pipeline. If it is not the first time, you can click on the New Pipeline button.
The new pipeline assistant is pretty straightforward so we are not going to detail how to add the repository here. Please remember that if you have a GitHub repository you need to create a personal token and you need to add it in Jenkins. This will allow Jenkins to see all your repositories.
Once you’ve selected the repository that has the Jenkinsfile, Jenkins will run it for the first time. As happened with GitHub Actions, it’s possible to set up the conditions to trigger the jobs running by clicking on the setup icon.

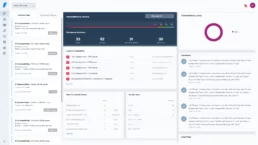
Once the execution is finished, you will see the results as in the following image:

As you’ve probably noticed, the execution results were successful. Now we can see our new workspace on our Faraday instance.

And that ‘s all. Now you can go to your Faraday instance and check the new workspace as we did in the previous posts.

Related Posts

Faraday Security v5.10 & v5.11: Latest Enhancements for Faster Threat Detection
We’re thrilled to kick off the year with a series of enhancements and new features for our vulnerability management platform! One of the…

CVSS v4: What’s New and Why It Matters for Your Vulnerability Management
In the ever-evolving landscape of cybersecurity, staying ahead of potential threats requires robust tools and accurate frameworks for…
Release v5.9.0
At Faraday, our focus is on simplifying the complex and delivering solutions that empower security professionals. With these updates, we’re…